
Before and after processing with texture overlays …
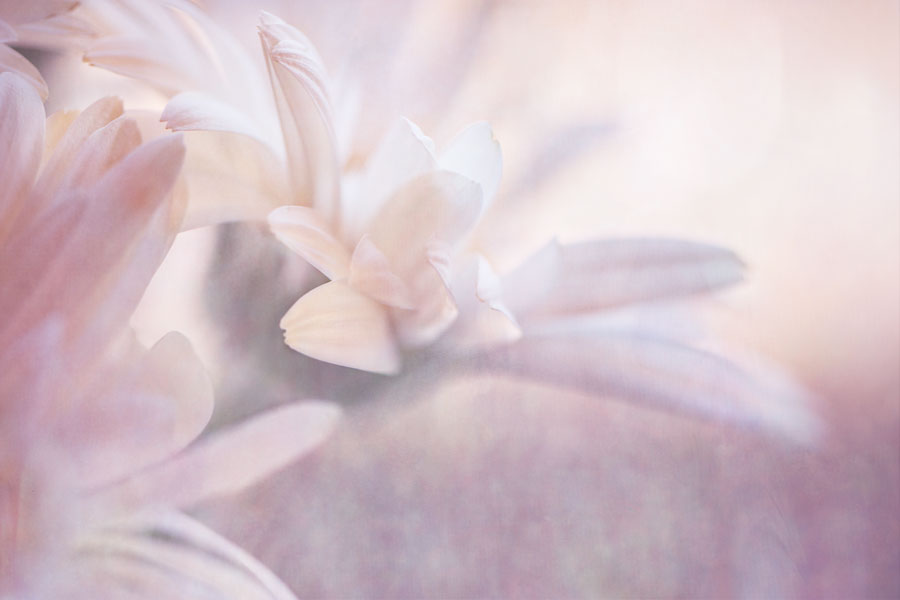

Creamy gerbera flowers processed to display the effects of three textures in the Holly Golightly Collection
Photoshop Texture Recipe
I thought I may as well show how I created the cover of the Holly Golightly Collection. It was a quick edit, completed this morning before work, so I could post the cover. After work I recorded the recipe, which took a bit longer. This recipe assumes a level of familiarity with applying and selectively removing textures in Photoshop. If you’re not familiar with the processes involved, please check out my tutorials.
Textures
Left to Right:
The Holly Golightly Collection Cover – showing the effects of the three textures in the collection
Mermaid Song – a light bright texture in tones of blue
Jelly Fish – a hazy texture with large soft bubbles in soft purpley blue tones
Grey Haze – a gentle texture of graduated cool grey and white markings in galvanised iron
(to view the textures at a larger size, click on the thumbnails below)
Recipe
1. Original image: Normal 100%
2. Grey Haze: Soft Light 50%; smart filter layer Gaussian Blur 51.2 pixels
3. Jelly Fish: Normal 49%
4. Jelly Fish: Soft Light 49%
5. Original image: Soft Light 29%
6. Original image: Overlay 100%; layer mask filled with black (allows no texture to show through), use white brush @ 100% opacity to reveal overlay effect (increased contrast) on petal edges
7. Mermaid Song: Pin Light 14%, layer mask black brush 100% remove from petals
8. Mermaid Song: Soft Light 21%
9. Original image: Screen 29%
10. Original image: Overlay 100%, layer mask filled with white (allows all texture through), use black brush @ 100% opacity to remove overlay effect & increased contrast in dark areas
11. Hue / Saturation Adjustment Layer (Hue 0, Saturation 25, Lightness 0): Screen 20%
SylviaLovely picture, Jane! such soft pretty colours
JaneThanks Sylvia : )
Lee Levin-FriendThis flower image is gorgeous! So soft and luscious!
HaddyAbsolutely beautiful!
JaneThanks Haddy – you are so supportive. I really appreciate that Jox:)