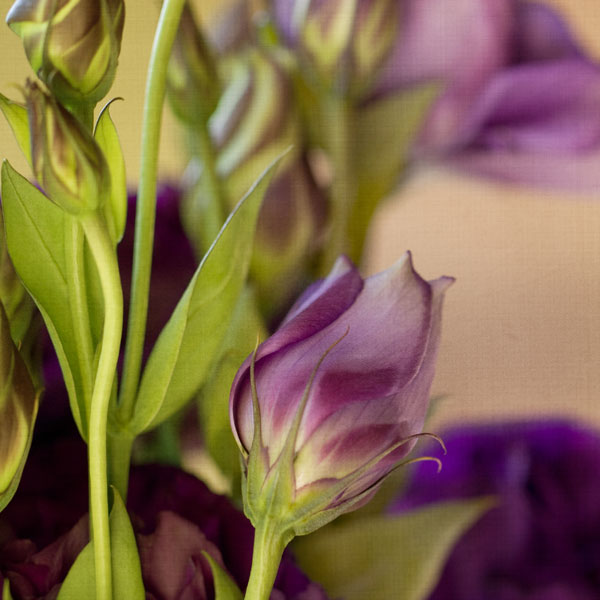
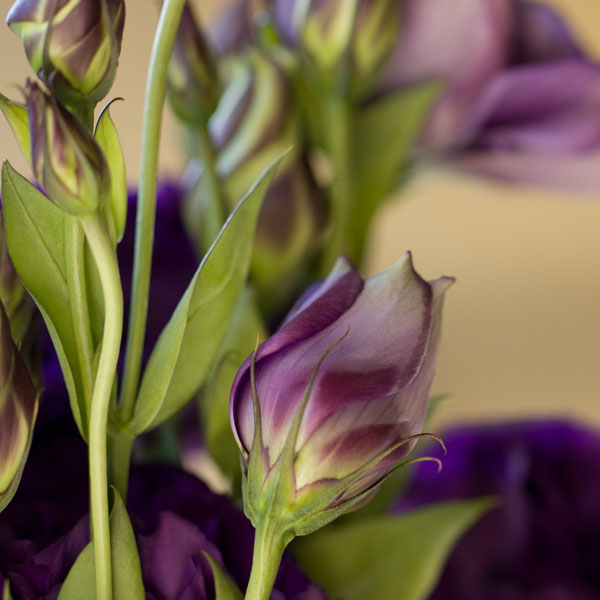
Before and after processing with texture overlays …
Lovely Lisianthus, lightly processed to create a subtle painterly effect.
For the past month or so, I’ve been developing this site, learning as I go. I’m really excited to ‘launch’ it as the New Year begins. At the turn of the year, it’s timely to reflect on the past and plan for the future. For me, 2010 has passed in a blur: it’s been a busy year without much time for reflection, but I have learned some important things about myself. I am not ‘over’ Toby’s death – I doubt I ever will be. I need work as a distraction: something to occupy my time and mind. I don’t find the work I do now particularly fulfilling – I’m not inspired by it the way I used to be inspired by my work as an alcohol and other drug counsellor, but I don’t think I could go back to therapeutic work – it’s too close to the bone. So taking and processing photos keeps me sane. It is a creative process which taps into the part of me that can still see beauty and feel hope. I plan to do much more of it in the coming year.
Photoshop Texture Recipe
This is a really simple quick edit ~ the type of edit I like best. When an image is well exposed, and the focus and colours are right, no remedial processing is needed. Then, the textures just add a little character. This recipe assumes a level of familiarity with applying and selectively removing textures in Photoshop. If you’re not familiar with the processes involved, please check out my tutorials.
Textures
Two versatile textures, Left to Right:
Jade Weave – subtle wood weave texture in a light bright jade colour
Rumpled Sheet – an olive green fabric texture
(to view the textures at a larger size, click on the thumbnails below)
Recipe
- Base layer – lisianthus flowers: Normal 100%
- Jade Weave: Desaturate 100%
- Jade Weave: Soft Light 100%
- Rumpled Sheet: Soft Light 100%


ChrisThe photos are as beautiful as your honesty and courage Jane.
Taniai am glad you have found photography. your photos are delicate and beautiful. they show the world as others most likely don’t see it. it sounds like your photography helps you to reconnect to a world that i expect feels very different.
your website is lovely Jane. i hope 2011 brings you happiness and more peace. you deserve it.
JaneThank you Tania – I really appreciate your encouragement & support.
Hey Chris, thank you for always being so positive & encouraging.
xox
Lynette HardingHi Jane. what a beautiful website. Thanks for sharing your very open, honest and passionate thoughts. This year marks the beginning of a new decade and will be the start of fresh insight, renewed energy and faith. I wish you all the best with the website and know that I am with you all the way. I do hope we can see each other soon. I played Toby’s memorial dvd on 31st and I laughed and cried as I watched and listened. Be comforted that she is with you always and will look out for you. Toby was a very special girl and I still have such fond memories her. My favourite was when she and I went to see Snow White & the Seven Dwarfs with her & she said no Lyn – seven weedorks. love and hugs. Lyn xoxxox
JaneThanks Lyn – yes, Brad & I have memories of Toby that make us laugh – she was a funny sweet girl. Hope things go well for you & Ruby Handmade Products this year. I’m about due to put in another order! Keep well – love Jane xox